④ Make and download evaluation scenario files
An evaluation scenario file is a file that defines the conditions for running a simulation, and is written in OpenScenario. This chapter explains the procedure for makingg and downloading an evaluation scenario file based on evaluation specifications.
As examples, we will explain the procedure using evaluation specification "No4_Foreseeable" based on the "reasonably foreseeable" range and evaluation specification "No4_Preventable" based on the "preventable" range.
Example 1: Make and download evaluation scenario files based on the evaluation specification "No4_Foreseeable"
Left-click on the fifth icon※ from the top on the left side of the screen.

※ The names and meanings of the icons in the scenario database are listed in the reference.
The following screen will be displayed.
Note: The quoted screenshots are captured when this manual was created, and may differ depending on your environment.
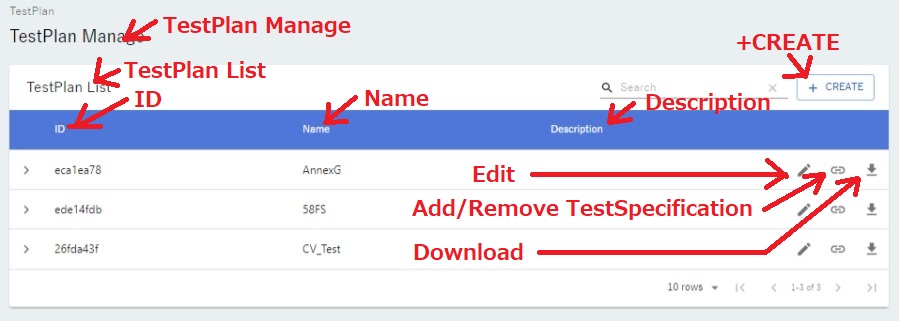
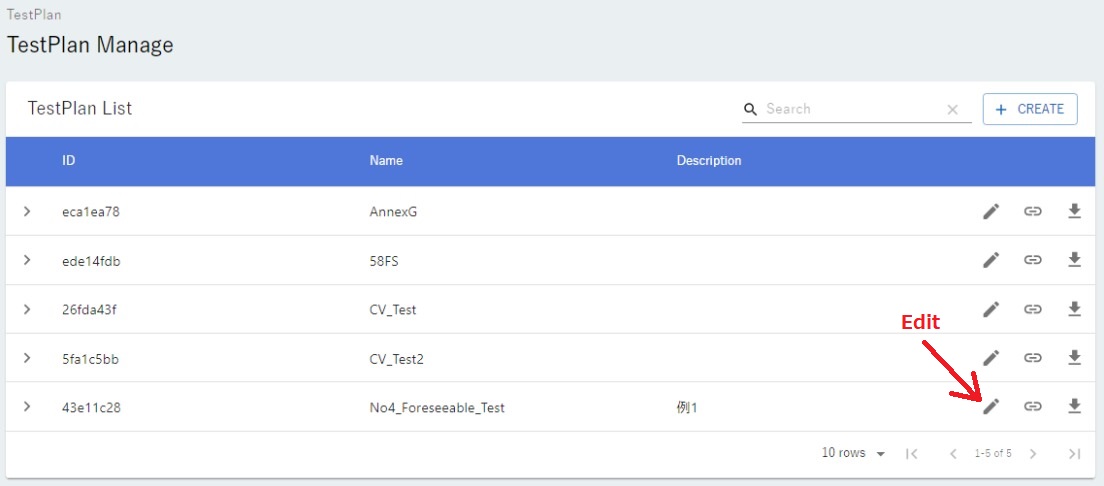
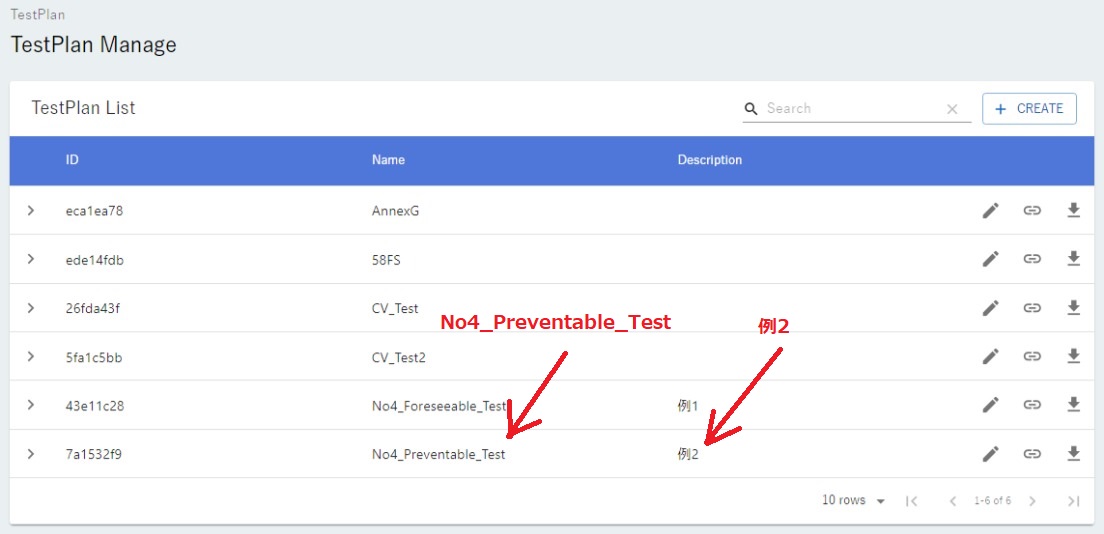
"TestPlan" on the screen is a specification that defines evaluation scenario files based on the evaluation specifications. "TestPlan" has the following sections: "ID", "Name", and "Description". "ID" is an ID that is automatically assigned by the scenario database to distinguish "TestPlans". "Name" is the name of the "TestPlan" specified by the user. "Description" is a note for the "TestPlan". The "+CREATE", "Add/Remove TestSpecification", and "Download" buttons will be explained later.
Left-click the "+CREATE" button in the upper right corner of the screen. The following screen will be displayed.
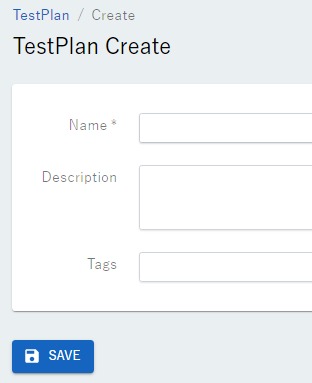
Enter the name of the "TestPlan" in "Name" and a note in "Description". Here, the name of the "TestPlan" is "No4_Foreseeable_Test" and "Description" is "例1", and the entries are as follows.
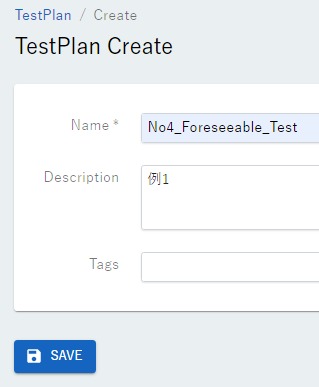
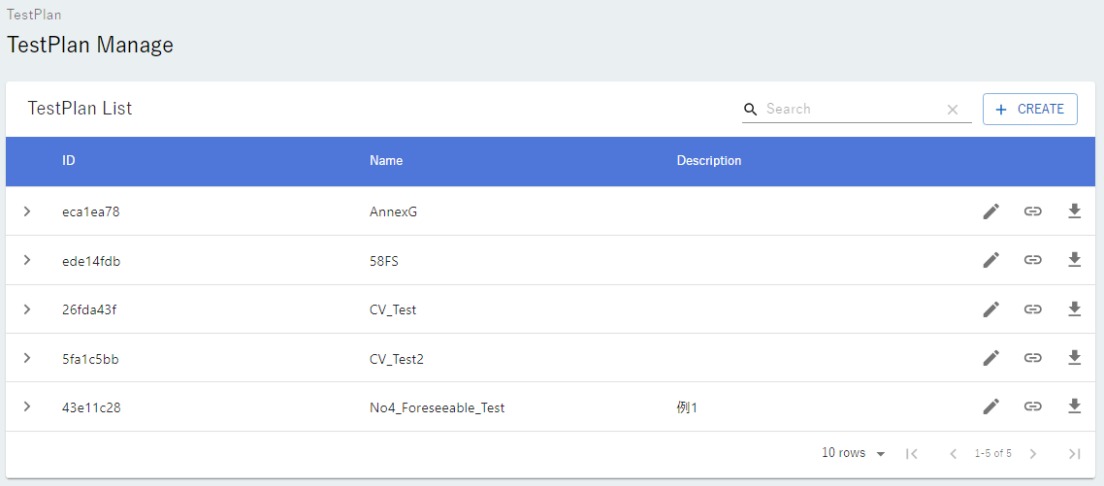
Left-click the "SAVE" button at the bottom left of the screen. The following screen will be displayed. You can confirm that "Name" and "Description" have been registered. You can also confirm that an "ID" has been automatically assigned.
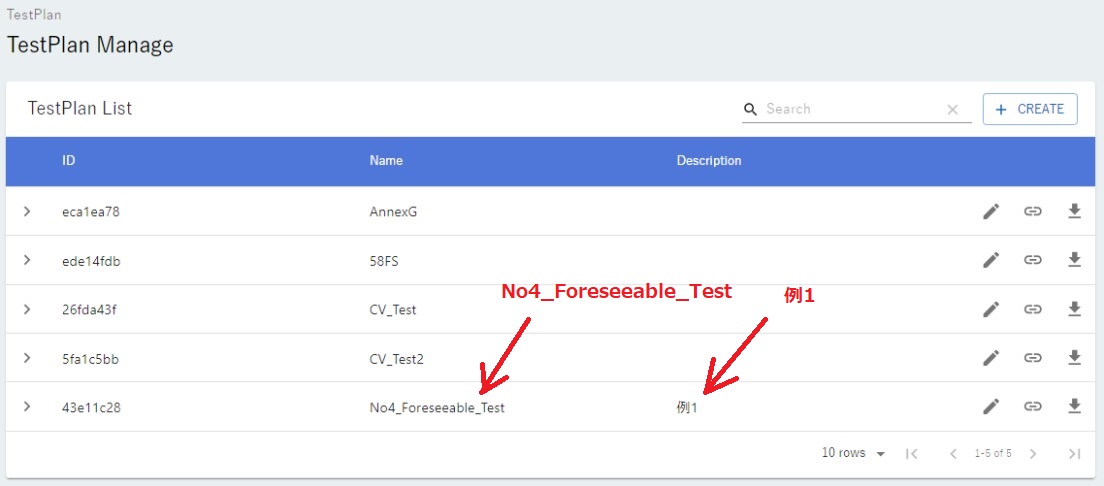
Next, left-click the "Edit" button on the row of the newly added "TestPlan" (Name: No4_Foreseeable_test).
The following screen will be displayed.
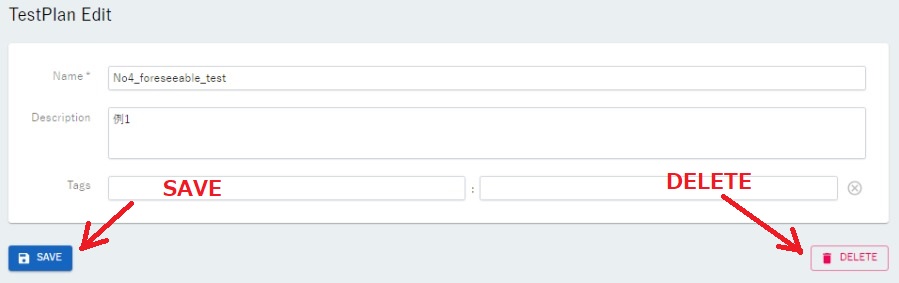
It is possible to change the "Name" and "Description", etc. Also, as you can see from the "DELETE" button at the bottom right of the screen, it is possible to delete the "TestPlan". Assuming that the contents will not be changed here, left-click the "SAVE" button without modifying the screen.
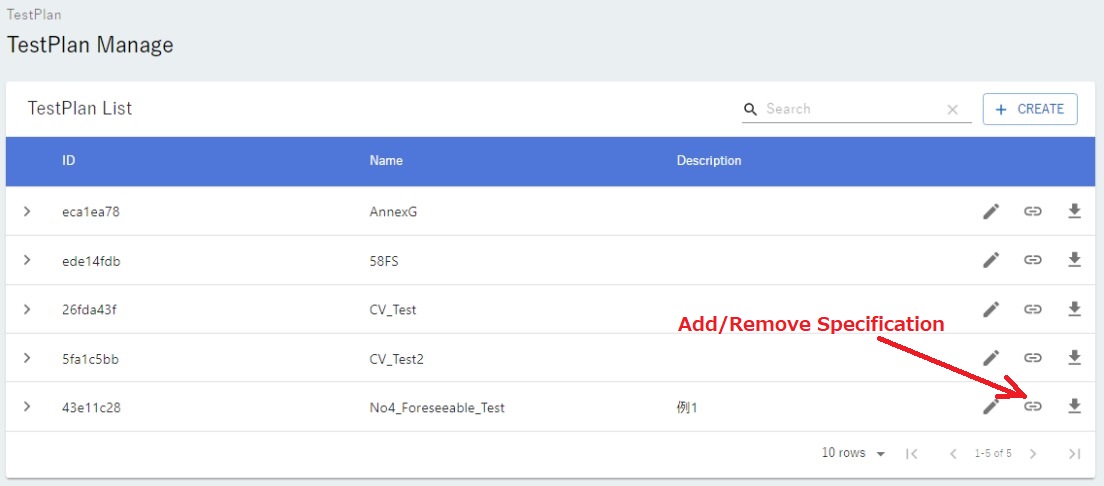
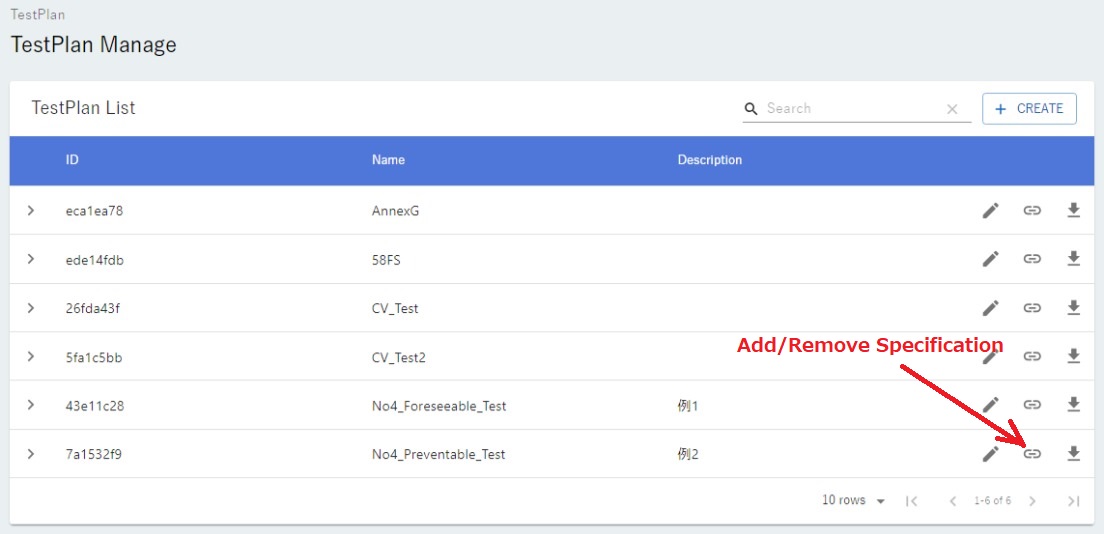
Next, left-click the "Add/Remove Specification" button on the "TestPlan" (Name: No4_Foreseeable_test) row.
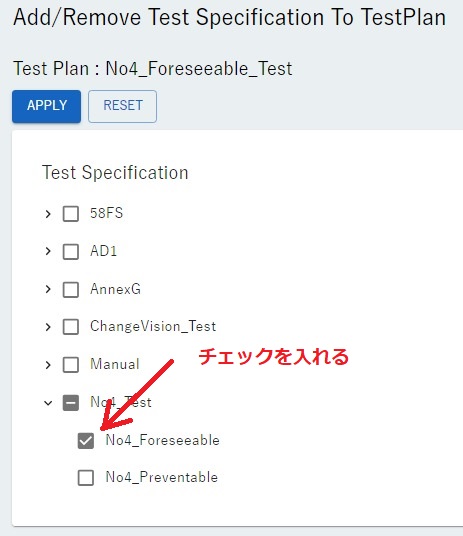
The following screen will be displayed.
Note: The quoted screenshots are captured when this manual was created, and may differ depending on your environment. Please pay attention only to the "No4_Test" folder.
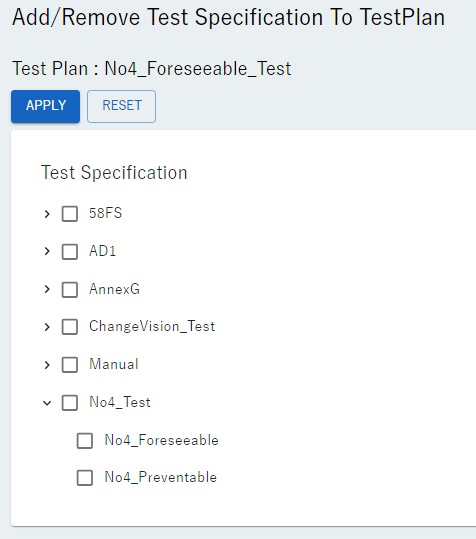
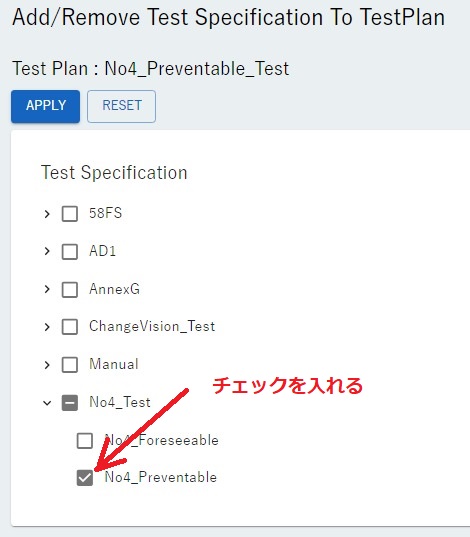
The screen displays multiple evaluation specifications that have already been registered in the scenario database. Select the evaluation specification that will be the basis for the evaluation scenario file you are about to create, and check the box as shown below. (This shows the evaluation specification: No4_Foreseeable checked.)
Left-click the "APPLY" button at the top of the screen. The "confirm" screen will appear. Left-click the "Continue" button. "Process Completed" will appear. Left-click the "OK" button.
Left-click on the fifth icon ※ from the top on the left side of the screen in the "Scenario Database" tab.
※ The names and meanings of the icons in the scenario database are listed in the reference.
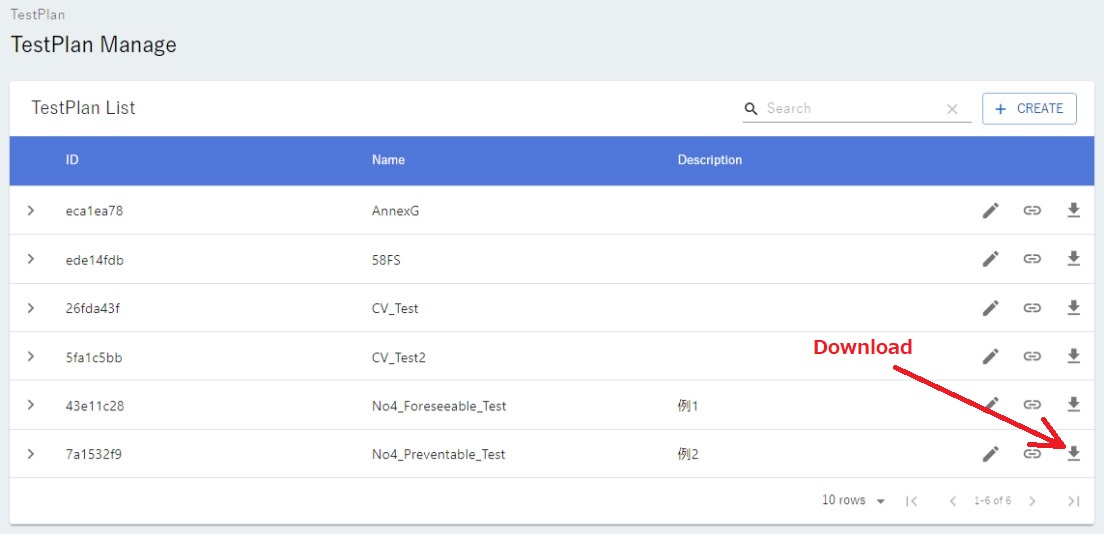
Next, left-click the "Download" button on the "TestPlan" (Name: No4_Foreseeable_Test) row.
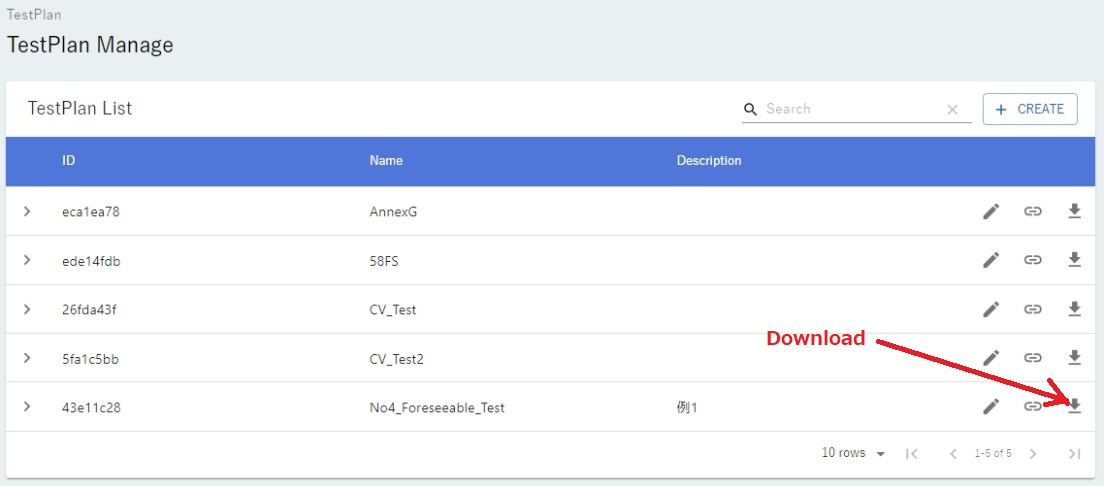
A zip file will be downloaded. When you unzip it, you will get the following files:
Note: The names and number of files created will vary depending on the evaluation specifications and the name of the "TestPlan."
43e11c28_TRAFFIC-DISTURBANCE-No4-00000001.xosc
43e11c28_TRAFFIC-DISTURBANCE-No4-00000002.xosc
43e11c28_TRAFFIC-DISTURBANCE-No4-00000003.xosc
58WP_straight.xodr
43e11c28_sim_result.json
Files with the extension "xosc" are OpenScenario files ※created for each evaluation scenario, and define the positions and velocity of ego vehicle and other vehicles. A file with the extension "xodr" is the OpenDrive file that defines roads. The OpenDrive file is used for all evaluation scenarios. A file with the extension "json" is the file used to visualize the results of simulation. How to use them is explained in ⑤ Execute simulation of evaluation scenarios and ⑥ Visualize simulation results.
※ A single or multiple evaluation scenarios are created based on the evaluation specification. The evaluation specification "No4_Foreseeable" defines three evaluation scenarios. The number that appears to the far right of the file name is called the "evaluation scenario number." For example, the "evaluation scenario number" of the file "43e11c28_TRAFFIC-DISTURBANCE-No4-00000001.xosc" is 1. The parameters for each evaluation scenario are listed below.
Evaluation scenario number |
1 |
2 |
3 |
\(V_{e0}\) [km/h] |
50 |
50 |
50 |
\(V_{o0}\) [km/h] |
30 |
30 |
30 |
\(d_{x0}\) [m] |
20 |
30 |
40 |
\(V_{y}\) [m/s] |
1.1 |
1.1 |
1.1 |
Example 2: Make and download evaluation scenario files based on the evaluation specification "No4_Preventable"
Please make sure that the "TestPlan Manage" screen is displayed. (If you have just completed the steps in Example 1, the "TestPlan Manage" screen will be displayed.)
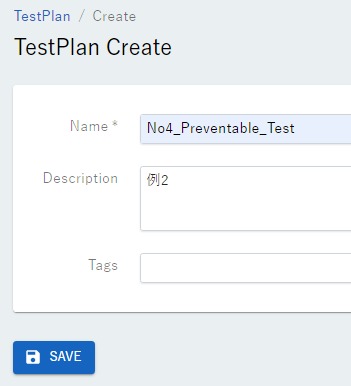
As in Example 1, left-click the "+CREATE" button on the "TestPlan Manage" screen. The following screen will be displayed.
Enter the name of the "TestPlan" in "Name" and a note in "Description". Here, the name of the "TestPlan" is "No4_Preventable_Test", "Description" is "例2", and the entries are as follows.
Left-click the "SAVE" button at the bottom left of the screen. The following screen will be displayed. You can confirm that "Name" and "Description" have been registered. You can also confirm that an "ID" has been automatically assigned.
Next, left-click the "Add/Remove Specification" button on the row of the newly added "TestPlan" (Name: No4_Preventable_Test).
The following screen will be displayed.

The screen displays multiple evaluation specifications that have already been registered in the scenario database. Select the evaluation specification that will be the basis for the evaluation scenario file you are about to create, and check the box as shown below. (This shows the evaluation specification: No4_Preventable checked.)
Left-click the "APPLY" button at the top of the screen. The "confirm" screen will appear. Left-click the "Continue" button. "Process Completed" will appear. Left-click the "OK" button.
Left-click on the fifth icon※ from the top on the left side of the screen in the "Scenario Database" tab.
※ The names and meanings of the icons in the scenario database are listed in the reference.
Next, left-click the "Download" button on the "TestPlan" (Name: No4_Preventable_Test) row.
A zip file will be downloaded. When you unzip it, you will get the following files:
Note: The names and number of files created will vary depending on the evaluation specifications and the name of the "TestPlan."
7a1532f9_TRAFFIC-DISTURBANCE-No4-00000001.xosc
:
7a1532f9_TRAFFIC-DISTURBANCE-No4-00000016.xosc
58WP_straight.xodr
7a1532f9_sim_result.json
The parameters for each evaluation scenario are reproduced below.
Evaluation scenario number |
1 |
2 |
3 |
4 |
5 |
6 |
7 |
8 |
9 |
10 |
11 |
12 |
13 |
14 |
15 |
16 |
\(V_{e0}\) [km/h] |
50 |
50 |
50 |
50 |
50 |
50 |
50 |
50 |
50 |
50 |
50 |
50 |
50 |
50 |
50 |
50 |
\(V_{o0}\) [km/h] |
30 |
30 |
30 |
30 |
30 |
30 |
30 |
30 |
30 |
30 |
30 |
30 |
30 |
30 |
30 |
30 |
\(d_{x0}\) [m] |
23 |
27 |
18 |
22 |
15 |
19 |
14 |
18 |
12 |
16 |
11 |
15 |
11 |
15 |
10 |
14 |
\(V_{y}\) [m/s] |
0.35 |
0.35 |
0.5 |
0.5 |
0.65 |
0.65 |
0.8 |
0.8 |
0.95 |
0.95 |
1.1 |
1.1 |
1.25 |
1.25 |
1.4 |
1.4 |